€10.50 (tax incl.)
Carving tool to make textures of plants and animals in leather.
These stamps are used to simulate feathers of birds, the scales of the fish and also for many floral details, tips of leaves and petals.
Among the specialized tools for leather carving, the mulefoot stamp stands out for its subtle yet striking effect on Western patterns, borders, and floral scrolls. Often paired with high-quality dyes, mulefoot stamps transform plain vegetable-tanned leather into richly textured, dimensional works that capture both the eye and the touch. From classic saddlery to distinctive knife and sword sheaths, understanding how to use, choose, and finish with mulefoot tools and dyes is key to elevating your leather projects to a true artisan standard.
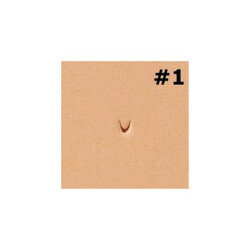
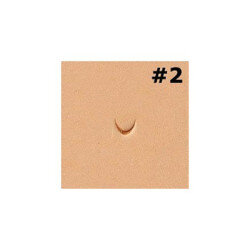
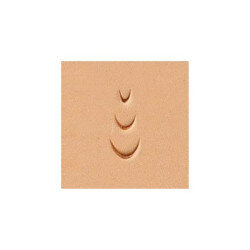
A mulefoot stamp is a small, hand-held tool made of steel or brass with a face shaped like a stylized “U” or sometimes an elongated almond or half-moon. The effect when struck is reminiscent of a mule’s hoof print—hence the name. This impression can be used in series or individually to add shadow, movement, and naturalistic curves in floral designs, scrolls, basketweave borders, or even as standalone motifs.
In saddlery, the mulefoot is a signature tool for building flow into Sheridan carving, giving energy to scrollwork, or creating distinctive elements in border patterns. For sheath making, mulefoot accents can refine the edge of a panel or provide eye-catching rhythm around animal, geometric, or brand motifs.
Mulefoot stamps come in several styles to suit different applications and creative tastes:
- Smooth-face mulefoot: The most traditional, providing a clean, polished impression that blends seamlessly with both background and focal carving.
- Checkered or textured mulefoot: These feature fine lines or crosshatching in the stamp’s face, creating greater depth and contrast—especially useful for highlighting edges or achieving a weathered, rugged look.
- Long or narrow mulefoot: Ideal for tight spaces, detailed scrolls, or intricate sheath panels. These allow the artisan to work around small corners or follow very curved lines.
- Wide or bold mulefoot: Better for laying down strong, dramatic accents in broad floral motifs or Western panel centers.
Some sets provide mirrored left and right mulefeet for perfect symmetry along borders or within complex saddle designs.
Like most premium stamping tools, mulefoot stamps are produced using two main methods:
- Cast steel or brass mulefoots: Molded into shape, these are widely available and budget-friendly, making them perfect for beginners or expanding a pattern library. They offer good initial clarity but may require replacements sooner if used heavily.
- Steel-forged or CNC-machined mulefeet: The gold standard for professional and production work. Forged from solid tool steel and hand-finished, these stamps maintain their fine detail through thousands of strikes, ensuring lasting sharpness and impression depth. Their investment pays off for busy saddle shops or artisans demanding consistent quality for every piece.
Many mulefoot stamps include knurled or ergonomic handles for added grip and comfort during extended sessions.
Mulefoot stamps are available in multiple sizes, typically measured by the width of the impression (at the open end of the "U"):
- Small mulefoots (2–4mm): Perfect for wallet corners, sheath edges, tiny scroll details, or filling tight spaces in dense border patterns.
- Medium mulefoots (5–7mm): The most versatile, commonly used for belt work, fender scrolls, and the primary accents on floral and scroll motifs in saddlery.
- Large mulefoots (8–12mm+): Excellent for making bold statements in saddle skirts, bag covers, or oversized Western designs and trophies.
A mix of sizes allows seamless transitions between detailed areas and bold focal points, ensuring natural-looking flow and dynamic rhythm through any carved composition.
The effectiveness of a mulefoot impression starts with well-cased vegetable-tanned leather. Dampen the surface evenly with water, let it rest until cool and flexible but not wet or sticky. Proper casing ensures the fibers are receptive to a sharp stamp but will spring back to hold crisp edges as the leather dries.
Lay the prepared leather on a solid, unyielding surface (granite, marble, or dense cutting board). Mark lines or curves carefully with a stylus or pencil to guide the series of mulefoot stamps, especially on flowing scrolls or borders.
Strike the mulefoot vertically and consistently, overlapping slightly for continuous motion or spacing as needed for individual accents.
Saddlery experts use mulefoot stamps in a variety of contexts:
- Outlining and accentuating scrolls, adding visual “lift” and style to Sheridan patterns or traditional Western carving.
- Incorporating rhythm and movement into borders, especially on belt tips, billet ends, or saddle skirt edges.
- Filling background gaps or blending transitions between floral and geometric elements.
For knife and sword sheaths, the mulefoot is perfect for small area accents: bordering a stitched seam, shadowing a stamped animal, or punctuating the end of a basketweave field. On wallets, journal covers, and accessories, mulefoot rows or scattered marks lend subtle sophistication.
Leather dyes add crucial depth and highlight to mulefoot work. Apply alcohol- or water-based dye after stamping to define the impression further; antiquing gel or paste brings contrast by settling in the lower, stamped impressions and darkening the shadows. This process accentuates both the stamp and the carved elements, making scrolls and borders “pop” visually.
For a multi-tone effect, use brushes or sponges to apply different shades to flower petals, scrolls, or backgrounds, allowing mulefoot accents to harmonize or stand out as desired.
Always test size, depth, and spacing on scrap before moving to the final project. For flowing Sheridan or floral patterns, let your mulefoot marks follow the curve for a sense of natural movement. Vary the stamp’s angle or overlap distance for softer effects, especially in backgrounds or layered scrollwork.
Keep your stamps clean and rust-free, and store them in a rack or case to avoid damage. Professional finishers may combine mulefoots with other accent tools (matting, pear shaders, cam stamps) for even greater intricacy and visual interest.
The mulefoot stamp is much more than a border accent—it’s a tool of rhythm, movement, and signature style in Western and modern leatherwork alike. When paired with quality dyes and good technique, it becomes a hallmark of consistency, depth, and artistry. Whether in show-grade saddlery, custom sheaths, or refined accessories, mastering the mulefoot will add a mark of craftsmanship to every piece you create.
Please sign in first.
Sign in
Create a free account to save loved items.
Sign in